Introduction
Jenkins is an open-source tool written in Java to set up continuous integration and continuous deployment (CICD) pipelines for faster software delivery. It is the main part of software development life cycle automation. This guide describes the step-by-step procedure of installing Jenkins and creating pipelines in Jenkins.
Prerequisites
- Webdock cloud Ubuntu Noble instance (Ubuntu 24.04)
- You have shell (SSH) access to your VPS
Jenkins installation
First update the apt packages on Ubuntu
$ sudo apt-get update -y
Install openjdk
$ sudo apt-get install default-jdk
Setup Jenkins' stable repository using the following commands
$ curl -fsSL https://pkg.jenkins.io/debian-stable/jenkins.io.key | sudo tee /usr/share/keyrings/jenkins-keyring.asc > /dev/null $ echo deb [signed-by=/usr/share/keyrings/jenkins-keyring.asc] https://pkg.jenkins.io/debian-stable binary/ | sudo tee /etc/apt/sources.list.d/jenkins.list > /dev/null
Update the apt packages
$ sudo apt-get update -y
Install Jenkins using the following command
$ sudo apt-get install jenkins -y
After installation, enable and start the Jenkins service.
$ sudo systemctl enable jenkins $ sudo systemctl start jenkins
Check the status of Jenkins service
$ sudo systemctl status jenkins
In the case of our Webdock perfect server stacks, open port 8080
$ sudo ufw allow 8080
Set Up Jenkins
After installing Jenkins, access the server on port 8080 of the Webdock instance like http://www.example.com:8080
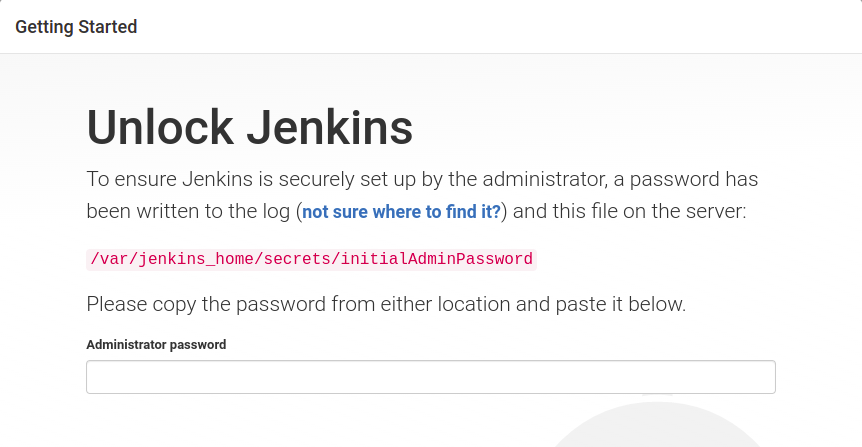
Jenkins will ask for an administrator password to unlock it. Get the administrator password from the Webdock instance using the following command.
$ sudo cat /var/lib/jenkins/secrets/initialAdminPassword
Next, it will ask for plugins installation. You can install plugins of your own choice or click on install suggested plugins button to install mostly used plugins.
After successful installation of plugins, it will take you to create the admin user for Jenkins.
After creating the admin user, Jenkins is properly configured and is ready to use.
Types of Jenkins Pipelines
Freestyle project
Freestyle projects can be configured from Jenkins GUI by adding steps. It provides a lot of flexibility but it is much more difficult to write complex pipelines using the freestyle project. Using freestyle project you can
- Execute windows batch commands
- Invoke Gradle script
- Execute shell commands
- Run workflow with timeout
Post-build actions can also be added to the freestyle project using GUI. The post-build action includes
- Archive the artifacts
- Build other projects
- Send email notification
- Delete workspace after the build is completed
- Aggregate downstream test results
- Publish JUnit test result report
Scripted pipeline
Scripted Pipeline was the first version of the pipeline as a code in Jenkins. It was designed as a general-purpose DSL (Domain Specific Language) built with Groovy syntax. Jenkinsfile in the scripted pipeline is written on the Jenkins UI.
Scripted pipelines have only two types of basic blocks ie, node and stage block. A node block specifies the machine that executes a particular pipeline and a stage block can be a single stage or multiple as the task goes.
Declarative pipeline
Declarative Pipeline is a modern and more simplified way of writing Jenkinsfile. Declarative Pipeline is also written in a groovy syntax. In the declarative Pipeline, Jenkinsfile is stored and checked into a source control management system like git. On run time, the Jenkins file from the git repo is cloned and executed.
Adding credentials to Jenkins
To enable Jenkins to interact with many third-party applications like servers on the cloud or GitHub, credentials are added in Jenkins. Jenkins uses these credentials to connect with third party services. In order to add credentials to Jenkins, follow these steps.
Install credentials plugin
Before adding credentials, first install the credentials plugin in Jenkins. The credentials plugin allows the user to store credentials in Jenkins.
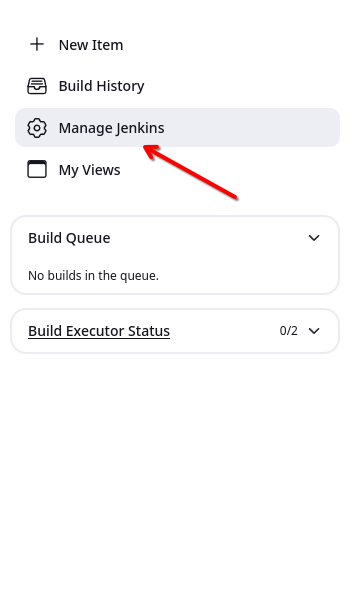
While setting up the Jenkins, if you have installed suggested plugins , then this plugin is already installed. Otherwise, click on Manage Jenkins from the Jenkins dashboard
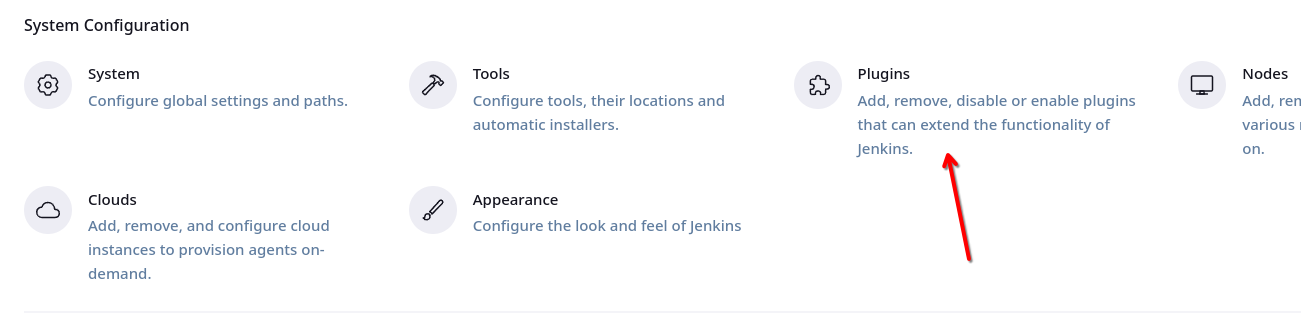
From the Manage Jenkins dashboard, click on the Plugins
From the Plugins , go to the Available tab. Search for the Credentials Plugin plugin from the available plugins and install it.

If you do not see any Credentials Plugin plugin in the available tab, check it in the installed tab. If this plugin exists in the installed tab then it is already installed.
Add credentials
After installing the Credentials plugin , now click on the Credentials under the Security section from the Manage Jenkins dashboard.

Under Stores scoped to Jenkins , click on System .

Click on the global credentials (unrestricted) .

From the left side panel, click on the Add Credentials button .

Now it will ask for different attributes of the credentials you want to store. The following types of credentials can be added to Jenkins.
- Username with password
- Github app
- SSH username with private key
- Secret file
- Secret text
- Certificates
In order to add a simple username with a password, add the details as follows
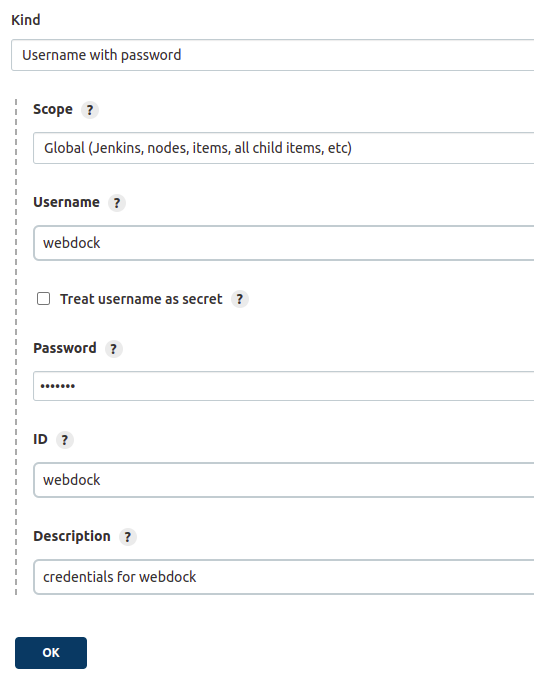
After adding details of credentials, click on the OK button and it will add the credentials.

Writing CICD pipeline in Jenkins
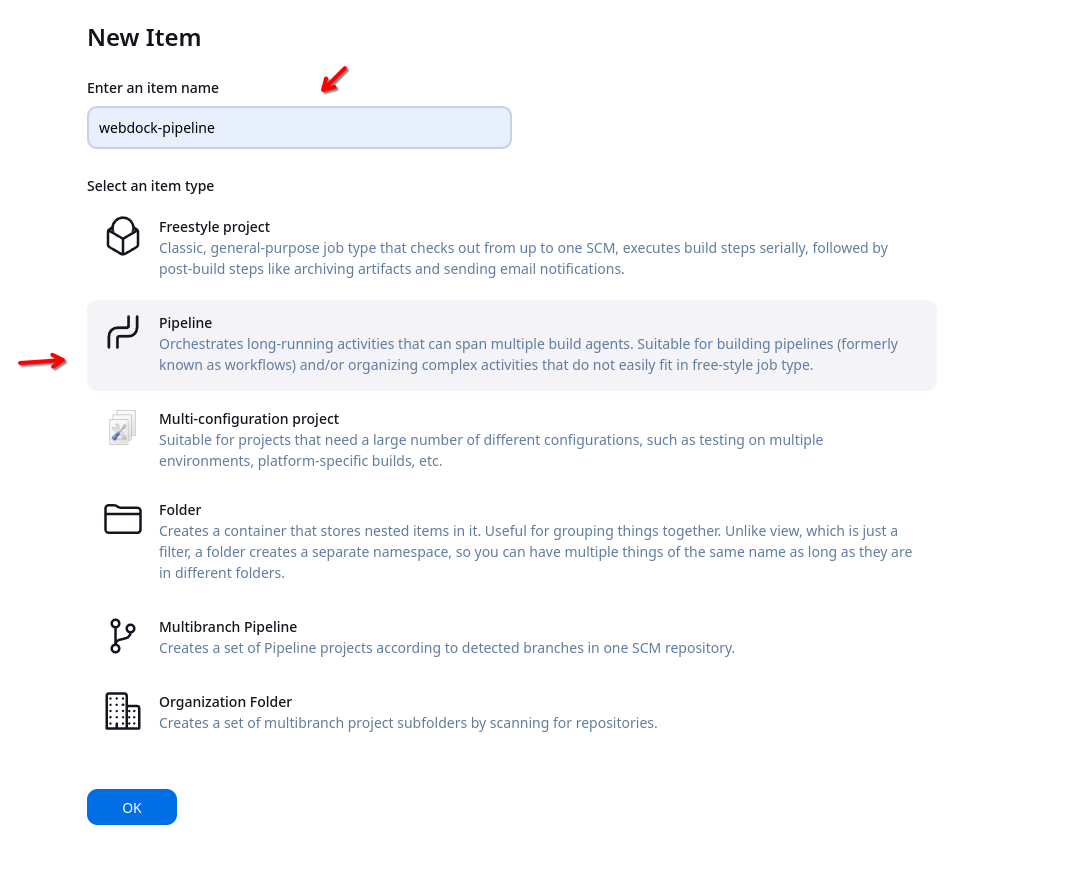
In order to create a CICD pipeline in Jenkins, click on the New Item from the left side panel in the Jenkins dashboard

Add the name of pipeline and select Pipeline as the type of pipeline.
It will take you to the configuration page of the pipeline. Scroll down to the Pipeline section and add the following script to the pipeline.
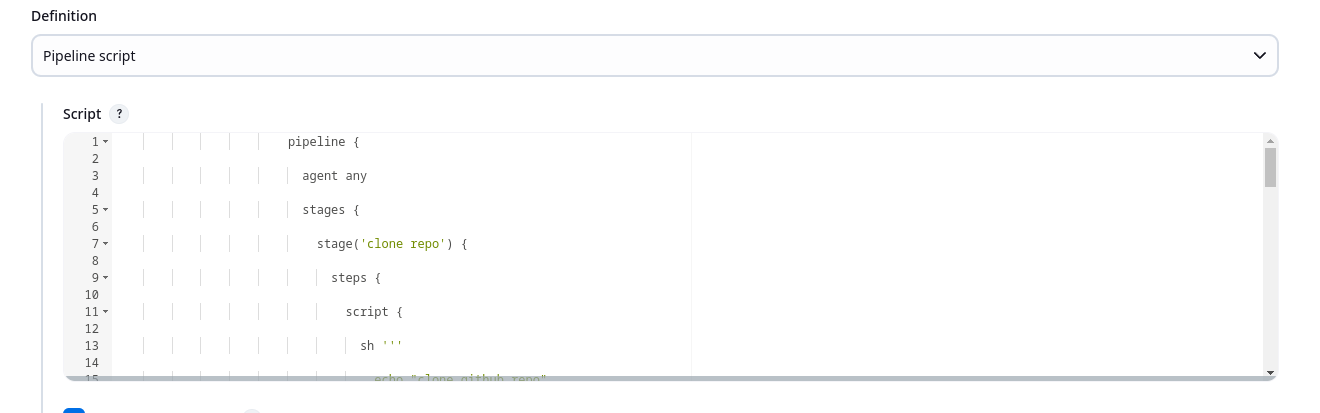
pipeline { agent any stages { stage('clone repo') { steps { script { sh ''' echo "clone github repo" ''' } } } stage('build project') { steps { script { sh ''' echo "building the project" ''' } } } stage('run tests') { steps { script { sh ''' echo "running automated test suite" ''' } } } stage('deploy application') { steps { script { sh ''' echo "deploy the application to server" ''' } } } } }
This pipeline script has multiple stages to deploy the application to the server. After writing the pipeline script, save the pipeline. Now from the pipeline, click on the Build now button to trigger the pipeline manually.

After the pipeline runs, it will show the status of the pipeline on Jenkins UI
Conclusion
Jenkins is the most used tool to build CI/CD pipelines for software delivery. This guide briefly describes the installation process of Jenkins and then writing the first CICD pipeline in Jenkins.
