Introduction
This guide provides a comprehensive, step-by-step process for installing CloudLinux on an existing AlmaLinux 9 server. CloudLinux enhances server security, stability, and resource management, making it a popular choice for shared hosting environments.
Prerequisites
- AlmaLinux 9 is installed and running
- Valid CloudLinux license key (commercial or trial)
- Root or sudo access to the server
Update the AlmaLinux System
Update all packages to the latest versions:
$ sudo dnf update -y
Obtain a CloudLinux License
Purchase a license or obtain a trial activation key from the CloudLinux website. If your license is IP-based (eg, via cPanel), you do not need an activation key
Download and Run the CloudLinux Installation Script
Download the CloudLinux OS Converter script:
$ wget https://repo.cloudlinux.com/cloudlinux/sources/cln/cldeploy $ chmod +x cldeploy
Run the installer using your license key (replace `YOUR_LICENSE_KEY`):
$ sudo ./cldeploy -k YOUR_LICENSE_KEY
If you have an IP-based license, use:
$ sudo ./cldeploy -i
The script will:
- Replace AlmaLinux packages with CloudLinux equivalents
- Update the kernel to the CloudLinux kernel
- Configure CloudLinux repositories
Kernel workaround
On AlmaLinux 9, the server will reboot into an older kernel on step 5, causing kmod-lve, along with the CloudLinux services, not to be able to start. Below are the workarounds that you can apply.
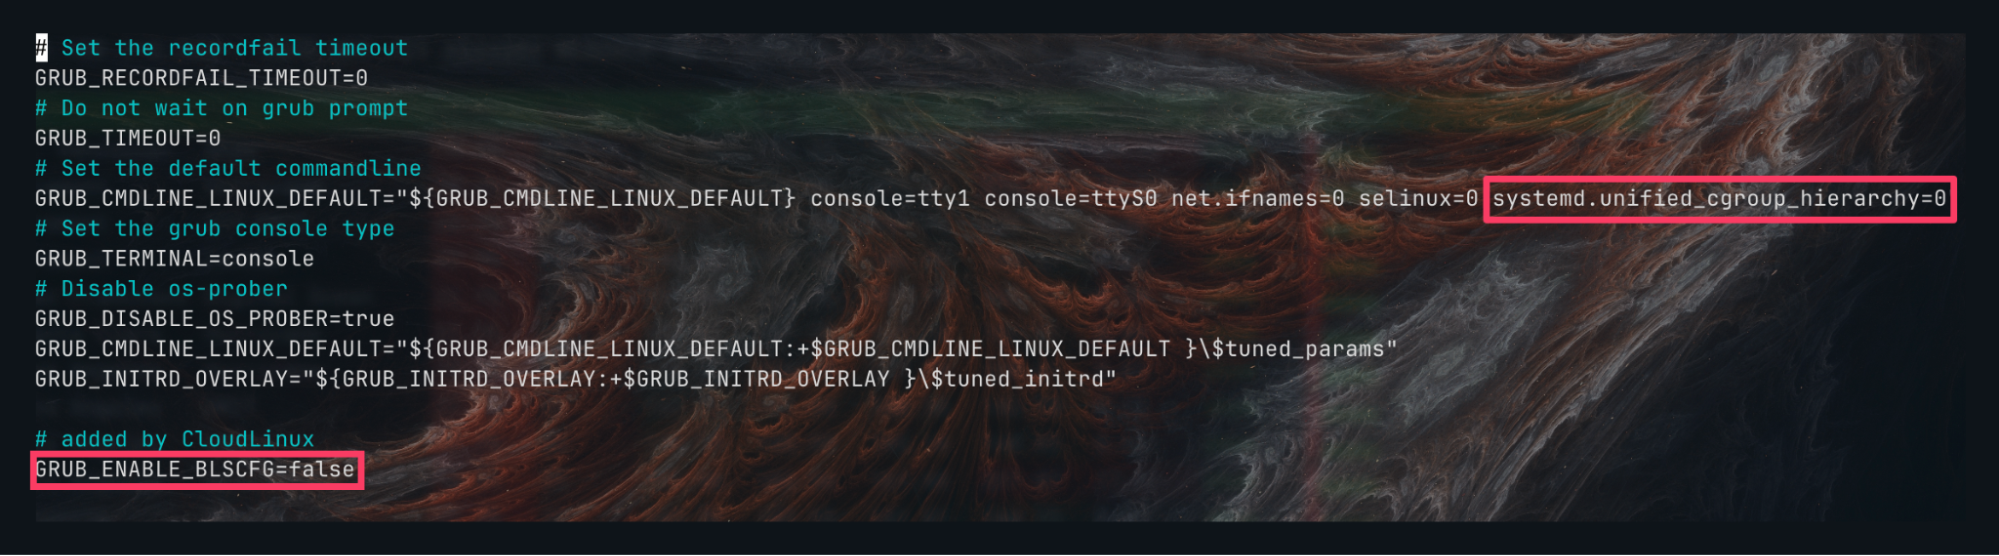
Edit the file /etc/default/grub for these steps.
Step 1: Cgroups v2 is not supported by kmod-lve, thus, you will need to add:
systemd.unified_cgroup_hierarchy=0 to the end of the " GRUB_CMDLINE_LINUX_DEFAULT " line.
Step 2: Disable BootLoaderSpec (BLS) by changing the value to false for the server kernel boot parameters to be taken directly from /etc/default/grub at boot time, instead of from an entry file located in /boot/loader/entries/*.conf
Regenerate the grub configuration:
$ sudo su # grub2-mkconfig -o /etc/grub2.cfg && grub2-mkconfig -o /etc/grub2-efi.cfg && grub2-mkconfig -o /boot/grub2/grub.cfg && grub2-mkconfig -o /boot/efi/EFI/almalinux/grub.cfg
Reboot the Server
After the script completes, reboot to load the new CloudLinux kernel:
$ sudo reboot
This ensures all CloudLinux components are active and integrated with AlmaLinux 9.
Verify the Installation
After rebooting, verify that CloudLinux is installed:
Check the OS release:
$ cat /etc/redhat-release
The output should be similar to:
CloudLinux release 9.6 (Georgy Dobrovolsky)
Check for CloudLinux utilities:
$ lvectl --version $ cldetect --help
These commands should work if CloudLinux is installed correctly.
Post-Installation Configuration
After installation, you can:
- Set LVE limits for users
- Enable CageFS for user isolation
- Configure additional CloudLinux modules and extensions as needed
Conclusion
You have successfully converted AlmaLinux 9 to CloudLinux. Enjoy enhanced security, stability, and resource management for your hosting environment.
This article was written by Webdock Support Specialist Taufiq Zainal. Taufiq is passionate about Cloud Hosting and helping Webdock Customers succeed wherever he can.
